
Dreamcore Playrooms Walkthrough (2026): All 8 Areas
A step-by-step Playrooms walkthrough for the dreamcore run: all eight areas in order, what to do in each, and the settings that keep the liminal mood intact.
Quick answer: Playrooms runs on a chain of eight areas, each opened with a key bought with delivered balls: Playroom → Poolroom → Backrooms → Waiting Room → Office → Hotel → School → final pit. A dreamcore run walks that chain slowly, fear setting low, sound on, one area per sitting. The steps below are the same route a normal run takes, ordered so you never have to backtrack and never have to guess which door is next.
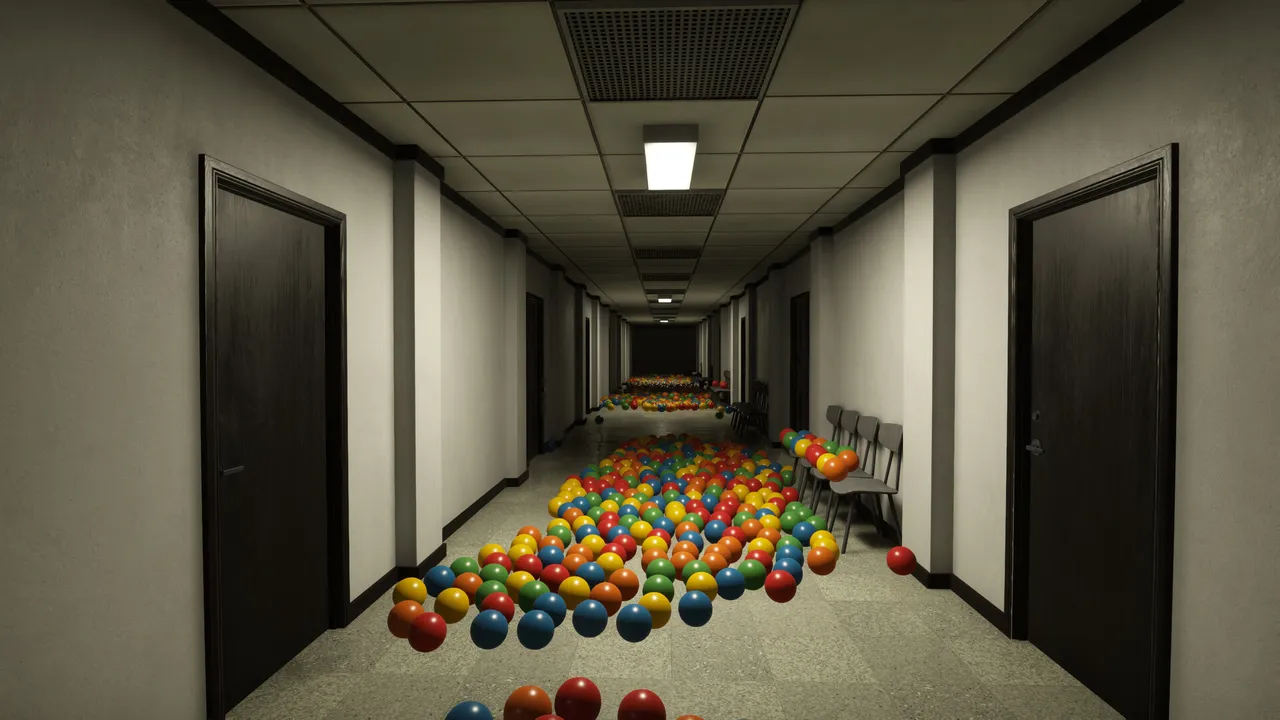
Before step one
Four decisions shape the whole run.
| Decision | Dreamcore choice | Why |
|---|---|---|
| Fear setting | Lowest | Keeps the atmosphere and removes the jump-cut scares |
| Audio | Music down, effects up | The hum, the tiles and the footsteps are the mood |
| Pacing | One area per session | The building reads as a place, not a level select |
| Collectibles | Only what you walk past | Hunting turns a walk into a checklist |
The store's own framing for the fear setting is "No fear at all, the way it's meant to be, or no second chances? You decide how dangerous your job gets." For this run, take the first option. Achievements are unaffected. The dreamcore tips page→ covers the mood side in more depth; this page is the route.
Step 1: Playroom — learn the loop
The Playroom is the tutorial disguised as a room: pink padded walls, one wide pit, balls everywhere and no maze.
- Pick up a full load by hand before touching any tool.
- Deliver, and watch what the pit does when it fills.
- Buy the first capacity upgrade as soon as the shop allows it.
- Walk the perimeter once, looking up: the last balls are on ledges.
- Leave only when the pit is full and the next key is affordable.
Do not rush this room. Everything later depends on the two habits it teaches: full loads and looking above eye level.
Step 2: Poolroom — the waterline
The Poolroom is the most photographed space in the game: white tile, three coloured slides, a pool with balls floating in it.
- Clear the dry deck first; it is the fastest ball income in the room.
- Work the waterline second, crouching at the edge.
- Check under the pool lip before you leave; balls collect in the gap.
- Use the slides as landmarks, not as routes. The curved stairs beside them were a known stuck-ball spot until patch 1.0.2 fixed it.
- Deliver before swimming for a single ball. The walk back is the cost, not the swim.
Step 3: Backrooms — the corridor loop
A blackout in the maze turns a pleasant walk into twenty minutes of wall-following. If the lights fail, stop moving forward and follow one wall back to the pit.
The yellow maze is the purest liminal space in the game and the first area that can genuinely lose you.
- Enter, turn around, and note the door you came through.
- Pick one wall and follow it without crossing the floor.
- Deliver every time you pass the pit, even with a partial load.
- Turn back from corridors you cannot see the end of.
- Do not sprint. The footsteps are the only reliable cue for what is behind you.
If the lights fail here, stop and wall-follow rather than pushing forward. A lost route in the Backrooms costs more time than any other mistake in the game.
Step 4: Waiting Room — the small pit
A reception with chairs, a desk and blind corners. Short, quiet, and the best area for a low-stress session.
- Sweep the chair rows from the wall side.
- Check the reception desk and behind it.
- Look at the ceiling: the pit lip and the light fixtures hold the leftovers.
- The pit is small, so a single full load often finishes it.
- Leave the blind corners for last, when the room is otherwise clear.
Step 5: Office — green carpet, one phone
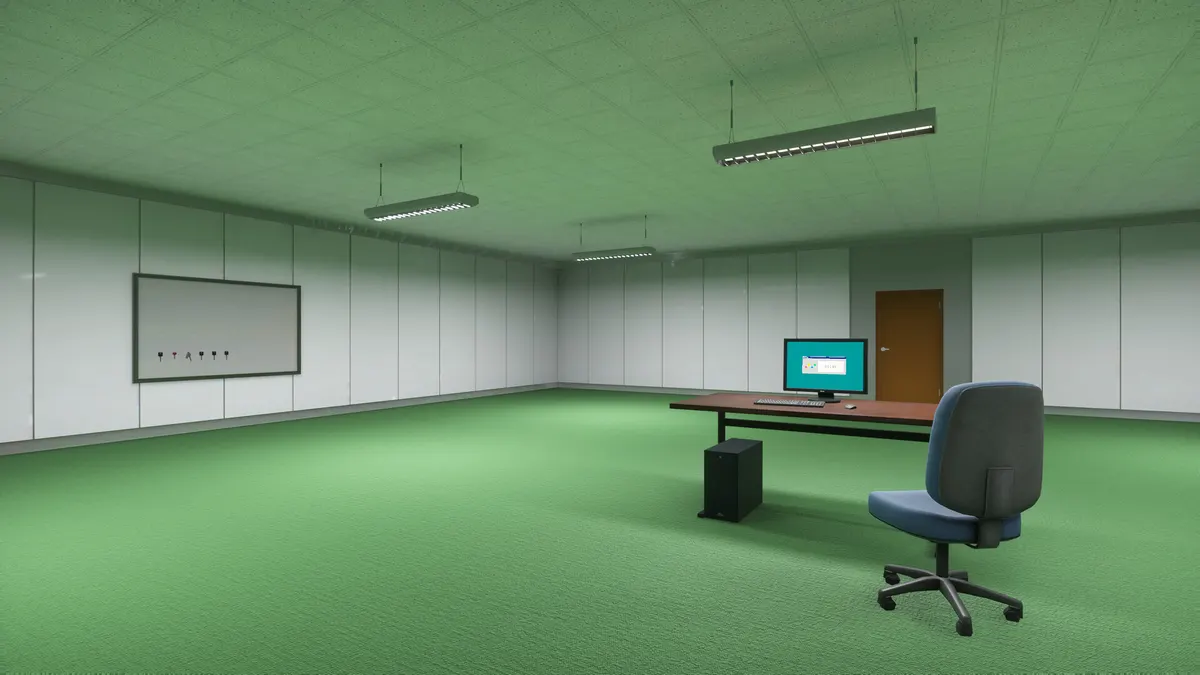
The Office is the least maze-like area and the most narrative one. Green carpet, a desk, a whiteboard, a phone.
- Clear the open floor first; it is large and bright.
- Check under the desk and behind the door.
- Decide about the phone before you pick it up. It adds a route complication and no achievement.
- Use the whiteboard upgrade here if you bought it: the room is where a written note actually helps.
- Deliver before exploring the side rooms.
Step 6: Hotel — room numbers are the map
Red corridors, numbered doors, a layout that shifts behind you. This is the area where the dreamcore look and the mechanical difficulty coincide.
- Read the room number before you enter a room, and remember the last one you cleared.
- Keep loops short: corridor, one room, back to the pit.
- Leave the corridor the moment it starts to narrow.
- Do not re-enter a finished room unless you are hunting something specific.
- If you get turned around, return to the pit and start the loop again.
Step 7: School — lockers and the gym
Classrooms, lockers that burst balls, and a gym with a ceiling that disappears into darkness.
- Empty your hands before opening any locker. A burst with full hands can under-deliver.
- Clear classrooms in number order so you always know which one is left.
- Save the gym for last; it is the biggest single delivery in the game.
- In the gym, follow the wall rather than cutting across the floor.
- If a locker under-delivers, load the save: patch 1.0.2 refills it and returns stuck balls.
Step 8: The final pit — the exit
The last area is a single delivery and an ending, not a maze.
- Deliver everything you are carrying before you approach the pit.
- Finish any collectible you still want in this save first; the run ends here.
- Fill the pit.
- Walk through the exit. "Clock out" is the achievement for doing exactly this.
If you are chasing 100%, do not end the run yet: the 100% checklist→ lists what becomes unreachable after the exit. If you are here for the mood, end it. The empty building after the last delivery is the point of the whole walk.
Route summary
| Order | Area | Time at a slow pace | Main risk |
|---|---|---|---|
| 1 | Playroom | 15–20 min | None |
| 2 | Poolroom | 20–30 min | Waterline balls |
| 3 | Backrooms | 20–30 min | Getting lost |
| 4 | Waiting Room | 10–15 min | Blind corners |
| 5 | Office | 15–20 min | The phone |
| 6 | Hotel | 25–35 min | Narrowing corridors |
| 7 | School | 30–40 min | Locker capacity |
| 8 | Final pit | 5 min | Ending the run early |
Times assume you clear each pit rather than every ball on the floor, and that you are not hunting sparrows. A completion run is longer in every area.
Common walkthrough mistakes
- Buying the robot before capacity. It is slower than hands in the early rooms and it cannot recover stuck balls.
- Clearing floors instead of pits. The pit is the objective; the floor is optional after it fills.
- Treating the Backrooms like a normal room. It is a loop, not a route.
- Hunting sparrows during a pit clear. The ball noise masks the chirp you are listening for.
About Playrooms (2026)
Playrooms is a single-player casual simulation game with horror elements from Two Pixels UG. It released for Windows PC on November 4, 2026 at $6.99, is in Early Access, and includes 30 achievements across the eight areas above. The store showed 1,744 reviews at Overwhelmingly Positive on November 19, 2026.
Cross-check version-sensitive details against the Steam listing ↗, the patch notes ↗ and the community hub ↗.
Official source: Playrooms on Steam ↗
FAQ
How many areas are in Playrooms? Eight: Playroom, Poolroom, Backrooms, Waiting Room, Office, Hotel, School and the final pit.
What order should you play the rooms in? The order above is the door chain: each area unlocks with a key bought with delivered balls. There is no chapter select, so the order is fixed per save.
Is there a dreamcore mode? No. Dreamcore describes the art direction, not a setting. The closest thing to a mode is the fear setting, which changes how much horror the same rooms deliver.
Do you need a map? There is no in-game minimap. One landmark per area plus the pit as an anchor is enough; the map and dreamcore guide→ lists a landmark for each room.
How long is a full walkthrough? A few hours at a normal pace, longer if you clear floors and hunt collectibles. One area per sitting keeps the atmosphere intact.
Can you go back to a room after leaving? Yes, until you fill the final pit. The exit ends the run for that save.